|
•
Jet's Dutch Tutorials
Jet's Original Tutorial here in Dutch
Download Supplies Filter - VanDerLee - Unplugged-X :
HERE Place the "Goldbeads.jpg" in the Patterns Folder of PSP
Place the "lace.jpg" in the Textures Folder of PSP Place the Brushes (@cb-texturizer1.PspBrush) and (BrushTip_@cb-texturizer1.PspScript) in the Brushes Folder of PSP Place the Selections (.PspSelection) in the Selections Folder of PSP Place the Tubes in a folder of your choice
Use this pencil to show you where you are in the tutorial. Just left click on it and drag it to where you want it to go. The pencil will stay in position until you close your browser. Drag and Drop Script: © Dynamic Drive (http://www.dynamicdrive.com)
Let's Start! File - New - New Image : 800 x 600 transparent Set the Foreground colour to : #0d1c2f Set the Background colour to : #364b76 Make a Gradient with the
Foreground colour, with the following settings: 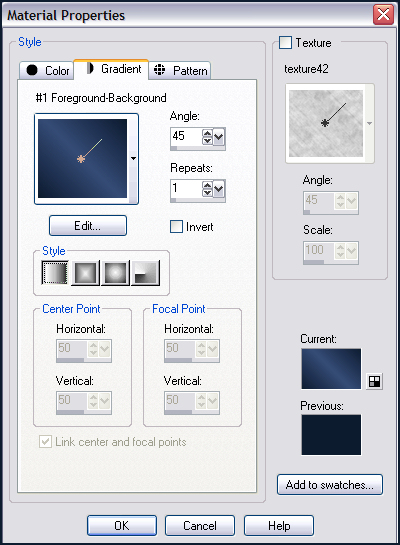 Floodfill the Layer with the Gradient Layers - Duplicate Effects - Plugins - Graphics Plus - Cross Shadow : Standard settings Layer Palette - Blend Mode : Overlay and Opacity : 29 Layers - New Raster Layer Selections - Load/Save Selection - Load Selection from Disk : Jet-sel1 Flood Fill the selection with the colour White Selections - Select None Effects - Texture Effects - Texture : lace, with the following settings: 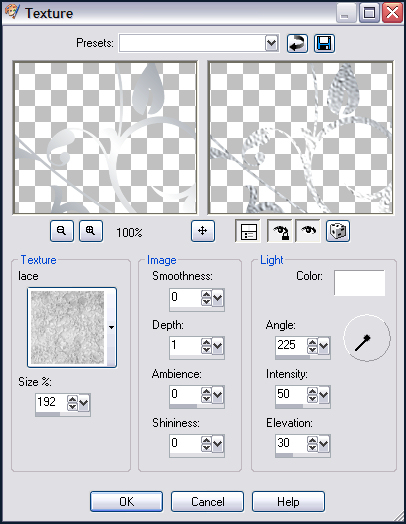 Layer Palette - Blend Mode : Soft Light and Opacity : 30
Layers - New Raster Layer Set the Foreground colour to White Activate the
Brush Tool and look for the Brush : @cb-texturizer1 Apply in the right bottom corner 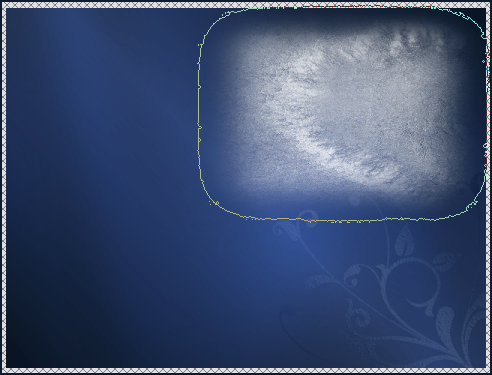 Adjust - Blur - Gaussian Blur : 40 Layer Palette - Blend Mode : Overlay and Opacity : 92
Open the tube : Mariel_2007_100ctobre_smoke01t.pspimage Edit - Copy Go back to your working image of 800 x 600 Layers - New Raster Layer Selections - Select All Edit - Paste into Selection
Selections - Select None Layer Palette - Blend Mode : Hard Light and Opacity : 33 Adjust - Blur - Gaussian Blur : 10 Layers - New Raster Layer Selections - Select All Edit - Paste into Selection (The tube octobre smoke will still be in the clipboard memory) Selections - Select None Layer Palette - Blend Mode : Luminance (Legacy) and Opacity : 32 Effects - Edge Effects - Enhance Layers - Duplicate Image - Mirror Layer Palette - Blend Mode : Multiply and Opacity : 33 Open the tube : jet-mistedface-blue.pspimage Edit - Copy Go back to your working image : 800 x 600 Edit - Paste as New Layer
Layer Palette - Blend Mode : Hard Light and Opacity : 40 Move the tube to the left, top corner (see below): 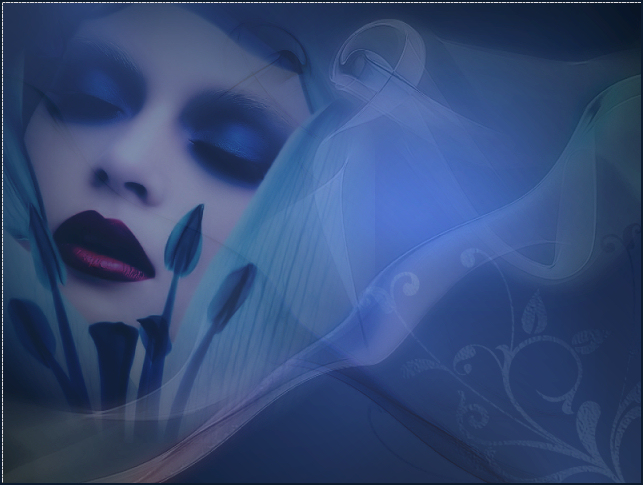
Effects - Plugins - VanDerLee - UnPlugged-X - Light, with the following settings:  Layers - New Raster Layer Selections -
Load/Save Selection - Load Selection from Disk : Jet-sel2 Flood Fill with the colour White Selections - Select None Effects - Texture Effects - Texture : lace Same settings as before Layer Palette - Blend Mode : Overlay and Opacity : 20 Effects - Edge Effects - Enhance Effects - 3D Effects - Drop Shadow,
with the following settings: 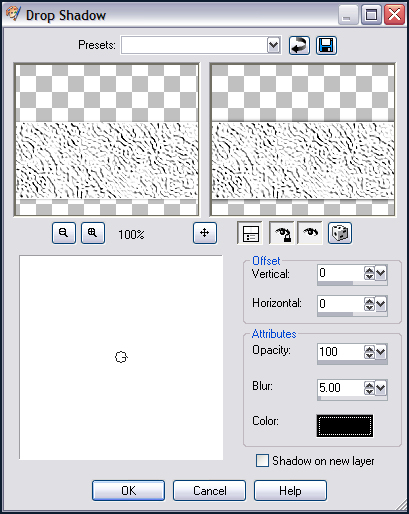 Layers - New Raster Layer Selections - Load/Save Selection from Disk : Jet-sel3 Flood Fill with the colour White Effects - Texture Effects - Texture : lace, with the same settings as before Selections - Select None Layer Palette - Blend Mode : Overlay and Opacity : 20 Effects - Edge
Effects - Enhance Effects - 3D Effects - Drop Shadow, with the same settings as before Open the tube : jet-tekst-blue.pspimage Edit - Copy Go back to your working image Edit - Paste as New Layer Move the text
onto the righthand lace border
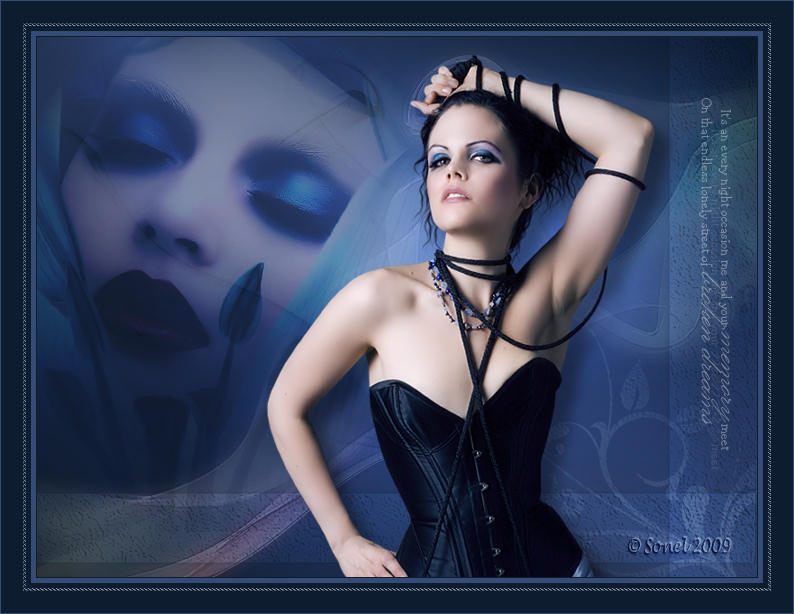
Opacity : 43 Open the tube : jet-woman17-januari-2008.pspimage Edit : Copy Go back to your working image Edit - Paste as New Layer Move the
tube a little to the right and against the bottom border Effects - 3D Effects - Drop Shadow, with the following settings: 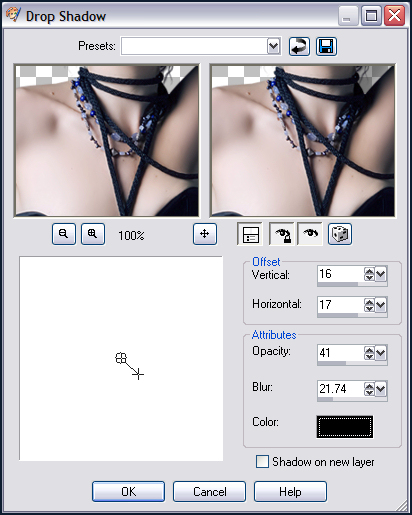 Image - Resize : 90% bicubic Resize all Layers! Image - Add Borders : 1 pixel #0d1c2f (dark colour) Image - Add Borders : 5 pixels #364b76 (light colour) Image : Add Borders : 30 pixels #0d1c2f (dark
colour) Selections - Select All Selections - Modify - Contract : 22 pixels Layers - New Raster Layer Flood Fill with the
Pattern : goldbeads Selections - Modify - Contract : 3 pixels Press Delete Selections - Select None Layer Palette - Blend Mode
: Luminance (Legacy) and Opacity : 50 Adjust - Sharpness - Sharpen Image - Add Borders : 1 pixel #364b76 (light colour) Place your name
and watermark and save a .jpg
Resize to choice
TERMS OF USE
•
|